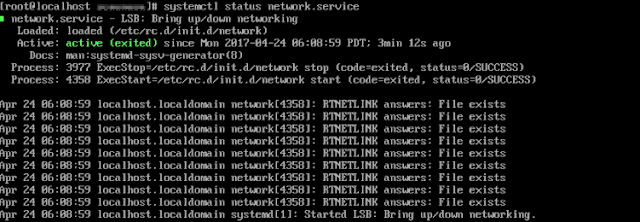
1. Make sure proper network adapter is set up on CentOS Virtual Machine.
systemctl status network.service
If not, please make sure following Network Adapter setting is set up for CentOS VM:
After setting up the above, please issue a network restart:
service network restart
2. Get private IP of the CentOS VM to us for connecting:
ifconfig
In the picture above, private IP is 172.16.1.128
3. Open Mac OS Terminal and ssh to the CentOS VM instance:
ssh user@172.16.1.128
4. That's it. You are now connected.
1. Create a text file with all paths to be activated or deactivated:
Example of line from paths.txt file:
/content/dam/products/space/image.jpg
2. Run the following script to deactivate or activate the paths (replace cmd operation below as per own need) :
#!/bin/bash
count=0
while IFS='' read -r line || [[ -n "$line" ]]; do
count=$((count+1))
echo $count
echo "Deactivating path: $line "
curl -u user:"pass" -X POST -F path="$line" -F cmd="deactivate" http://AEM-instance-ip:port/bin/replicate.json
sleep 1
done < "paths.txt"
Note: Please run the above script from within same private network where AEM is located. You do not want to send pass/user over the internet.
If you want command like ls -alh in one go, you can create an alias using the following:
alias ll="ls -alh"
Now each time you type ll, you'll get the output for "ls -alh" and win few fraction of second :)
To plain display certificate, you can use the following:
Display certificate:
CSR:
openssl req -in req.csr -noout -text
Certificate - Public Key:
openssl x509 -in cert.cer -noout -text
In order to make sure those use the same private key, modulus section shall be the same.
So, all the below shall match:
Private Key:
openssl rsa -noout -modulus -in private.key
CSR:
openssl req -noout -modulus -in req.csr
Certificate - Public Key:
openssl x509 -noout -modulus -in cert.cer
Note: Below tested on CentOS/RedHat 7x
1. In source system generate keys for specific user:
ssh-keygen -t rsa -C "user@source-machine-name"
Enter file in which to save the key (/root/.ssh/id_rsa): filename_rsa
No Passprase Enter passphrase (empty for no passphrase): passphrase
Enter same passphrase again: passphrase
2. In destination system under /home/user create .ssh folder (owner user and rights 700), and after create FILE authorized_keys (inside .ssh folder) (chmod 644 chown user) and copy Public key from source system into this file.
3. In destination system:
service sshd restart
4. SSH from source to destination
ssh -i id_rsa_user user@destination-machine-ip
5. SCP files from source to destination
scp -i id_rsa_user /path/test.txt user@destination-machine-ip:/destination-folder/
If there are issues with disk I/O or CPU wait time, you might consider fine tunning read ahead disk parameters:
1. Check current values and volumes:
blockdev --report
2. Set up proper parameters:
sudo blockdev --setra 256 /dev/xvda
If you want to read more, good documentation is here:
https://access.redhat.com/documentation/en-US/Red_Hat_Enterprise_Linux/6/html/Performance_Tuning_Guide/main-fs.html
Set Date&Time as needed:
1. List all available timezones:
timedatectl list-timezones
2. Update timezone and check:
echo 'ZONE="Europe/Madrid"' > /etc/sysconfig/clock && ln -sf /usr/share/zoneinfo/Europe/Madrid /etc/localtime && date