Just run the following command:
mvn -v
You'll get a line as the below with Maven home:
Maven home: /usr/share/maven
Sunday, November 26, 2017
Start Apache Sling environment on CentOS
1. Download latest Sling version from:
https://sling.apache.org/downloads.cgi
2. Copy jar file to your desired location on CentOS
3. Start Apache Sling using the following command:
java -jar org.apache.sling.launchpad-8.jar
4. You'll get starting status right on the screen:

5. Also you get logs under:
/slinghome/sling/logs
Here you can properly tail error.log to see what's going on:
tail -500f error.log
6. As you can see from step 4, Sling by default starts on port 8080. As for that you can launch IP:8080 and get Sling Welcome Page:

7. Admin Console is also accessible at IP:8080/system/console. Please be aware that default user/pass is admin/admin:

https://sling.apache.org/downloads.cgi
2. Copy jar file to your desired location on CentOS
3. Start Apache Sling using the following command:
java -jar org.apache.sling.launchpad-8.jar
4. You'll get starting status right on the screen:

5. Also you get logs under:
/slinghome/sling/logs
Here you can properly tail error.log to see what's going on:
tail -500f error.log
6. As you can see from step 4, Sling by default starts on port 8080. As for that you can launch IP:8080 and get Sling Welcome Page:
7. Admin Console is also accessible at IP:8080/system/console. Please be aware that default user/pass is admin/admin:
Mac OSX: Connect from terminal to CentOS virtual machine - VMWare Fusion
1. Make sure proper network adapter is set up on CentOS Virtual Machine.
systemctl status network.service
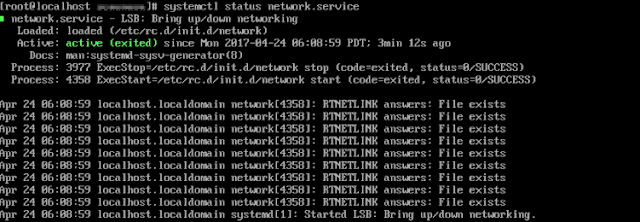
If not, please make sure following Network Adapter setting is set up for CentOS VM:

After setting up the above, please issue a network restart:
service network restart
2. Get private IP of the CentOS VM to us for connecting:
ifconfig

In the picture above, private IP is 172.16.1.128
3. Open Mac OS Terminal and ssh to the CentOS VM instance:
ssh user@172.16.1.128
4. That's it. You are now connected.
Sunday, November 19, 2017
AEM - Use cURL to activate or deactivate paths, assets or content
1. Create a text file with all paths to be activated or deactivated:
Example of line from paths.txt file:
/content/dam/products/space/image.jpg
2. Run the following script to deactivate or activate the paths (replace cmd operation below as per own need) :
#!/bin/bash
count=0
while IFS='' read -r line || [[ -n "$line" ]]; do
count=$((count+1))
echo $count
echo "Deactivating path: $line "
curl -u user:"pass" -X POST -F path="$line" -F cmd="deactivate" http://AEM-instance-ip:port/bin/replicate.json
sleep 1
done < "paths.txt"
Note: Please run the above script from within same private network where AEM is located. You do not want to send pass/user over the internet.
Monday, November 6, 2017
Use of alias in Linux in order to shortcut commands
If you want command like ls -alh in one go, you can create an alias using the following:
alias ll="ls -alh"
Now each time you type ll, you'll get the output for "ls -alh" and win few fraction of second :)
alias ll="ls -alh"
Now each time you type ll, you'll get the output for "ls -alh" and win few fraction of second :)
Saturday, November 4, 2017
How to verify if CSR - Certificate Request and SSL certificate - Public Key are using same private key
To plain display certificate, you can use the following:
Display certificate:
CSR:
openssl req -in req.csr -noout -text
Certificate - Public Key:
openssl x509 -in cert.cer -noout -text
In order to make sure those use the same private key, modulus section shall be the same.
So, all the below shall match:
Private Key:
openssl rsa -noout -modulus -in private.key
CSR:
openssl req -noout -modulus -in req.csr
Certificate - Public Key:
openssl x509 -noout -modulus -in cert.cer
Saturday, October 7, 2017
How to scp/ssh using private/public keys
Note: Below tested on CentOS/RedHat 7x
1. In source system generate keys for specific user:
ssh-keygen -t rsa -C "user@source-machine-name"
Enter file in which to save the key (/root/.ssh/id_rsa): filename_rsa
No Passprase Enter passphrase (empty for no passphrase): passphrase
Enter same passphrase again: passphrase
2. In destination system under /home/user create .ssh folder (owner user and rights 700), and after create FILE authorized_keys (inside .ssh folder) (chmod 644 chown user) and copy Public key from source system into this file.
3. In destination system:
service sshd restart
4. SSH from source to destination
ssh -i id_rsa_user user@destination-machine-ip
5. SCP files from source to destination
scp -i id_rsa_user /path/test.txt user@destination-machine-ip:/destination-folder/
Subscribe to:
Posts (Atom)